

I lost my original set at a gig and so this set is a replacement. I love the voice straw and bring it with me to show for a quick reset.

We believe vocalizing should feel easy.
Getting Started: Original Voice Straw™
Step 1: Wash Your Tools
Put a dab of the Voice Straw™ Cleaning Soap or dish soap on the cleaning brush. Scrub the inside and outside of each straw and cup end-to-end. Rinse tools thoroughly with hot water. Let straws and cups air dry in a ventilated place. Do not put tools away wet. Clean and rinse cleaning brush regularly.
Step 2: Find Your Resting Larynx Position
Place your hand on your larynx, where your Adam’s apple is (or would be). Pant like a small dog. The larynx should rise. Now, pant like a big dog. The larynx should lower. The resting position of your larynx should be between these two extremes.
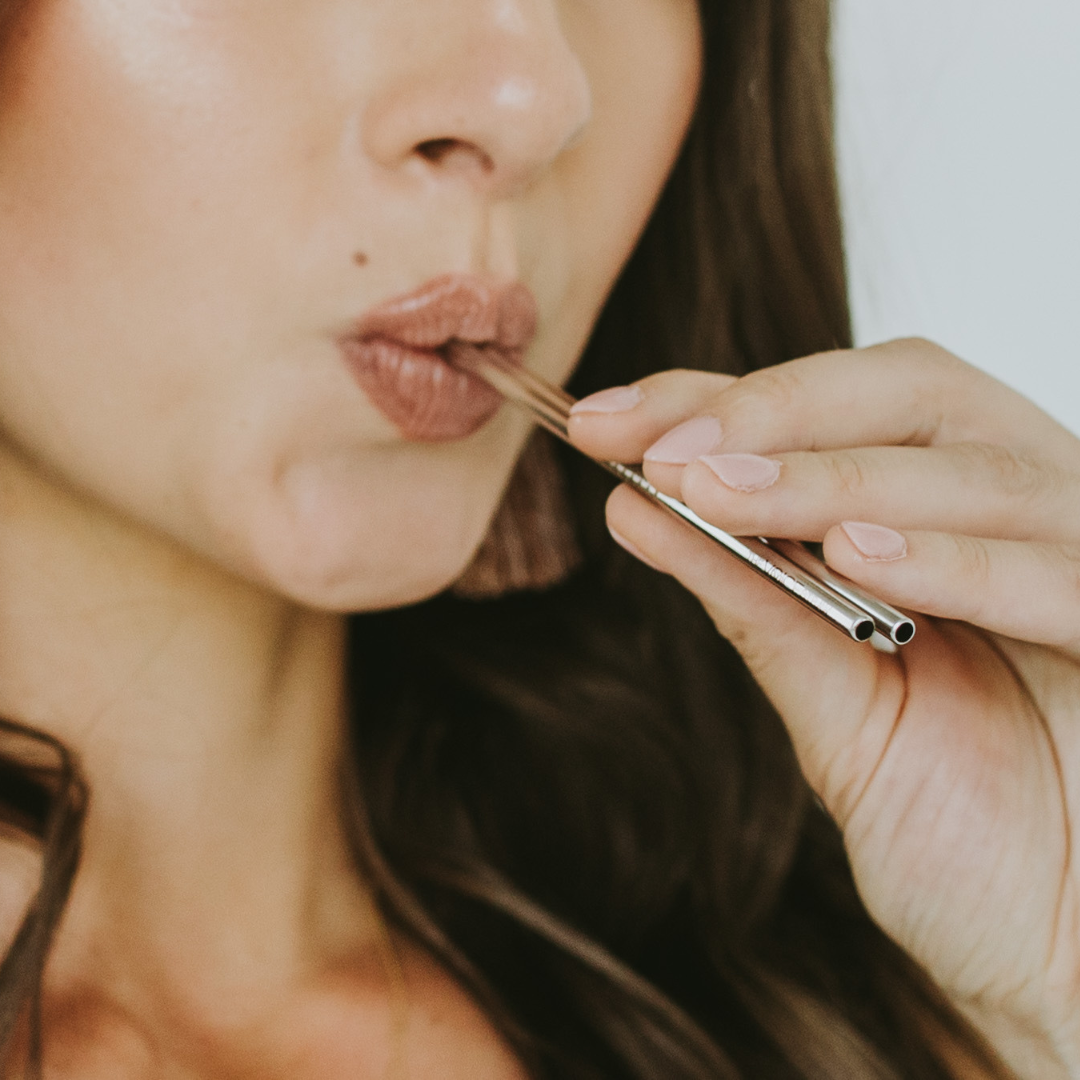
Step 3: Finding the Correct Straw Diameter
Start with the biggest straw first, making sure your larynx is in its resting position. Wrap your lips tight around the straw, making sure no air is escaping through your mouth or nose. Blow air into the straw in a steady stream. Now, give a gentle whoop, like you’re starting a cold car.
If you feel like you’re blowing air into the straw with no resistance, choose a smaller size.
Repeat the above exercises with smaller straws. If you feel tension or squeezing in your throat, choose a larger size.
When you have the correct size, you should feel a gentle expansion in the throat when you blow into the straw. There should be no pain or tension.
The right straw size for you may vary day-to-day. You may need to use a larger size after a difficult vocal session or if your voice is tired. Repeat this process every time you practice with the straw to ensure the right fit.
Still have questions? Check out the diagram below called "Choosing Your Resistance"
Step 4: Start Your Exercises
Once you’ve found the correct straw size, start with some gentle low-to high pitch glides into the straw. Experiment with dynamics.
When you feel comfortable vocalizing into the straw, you’re ready to begin the Voice Straw exercises!
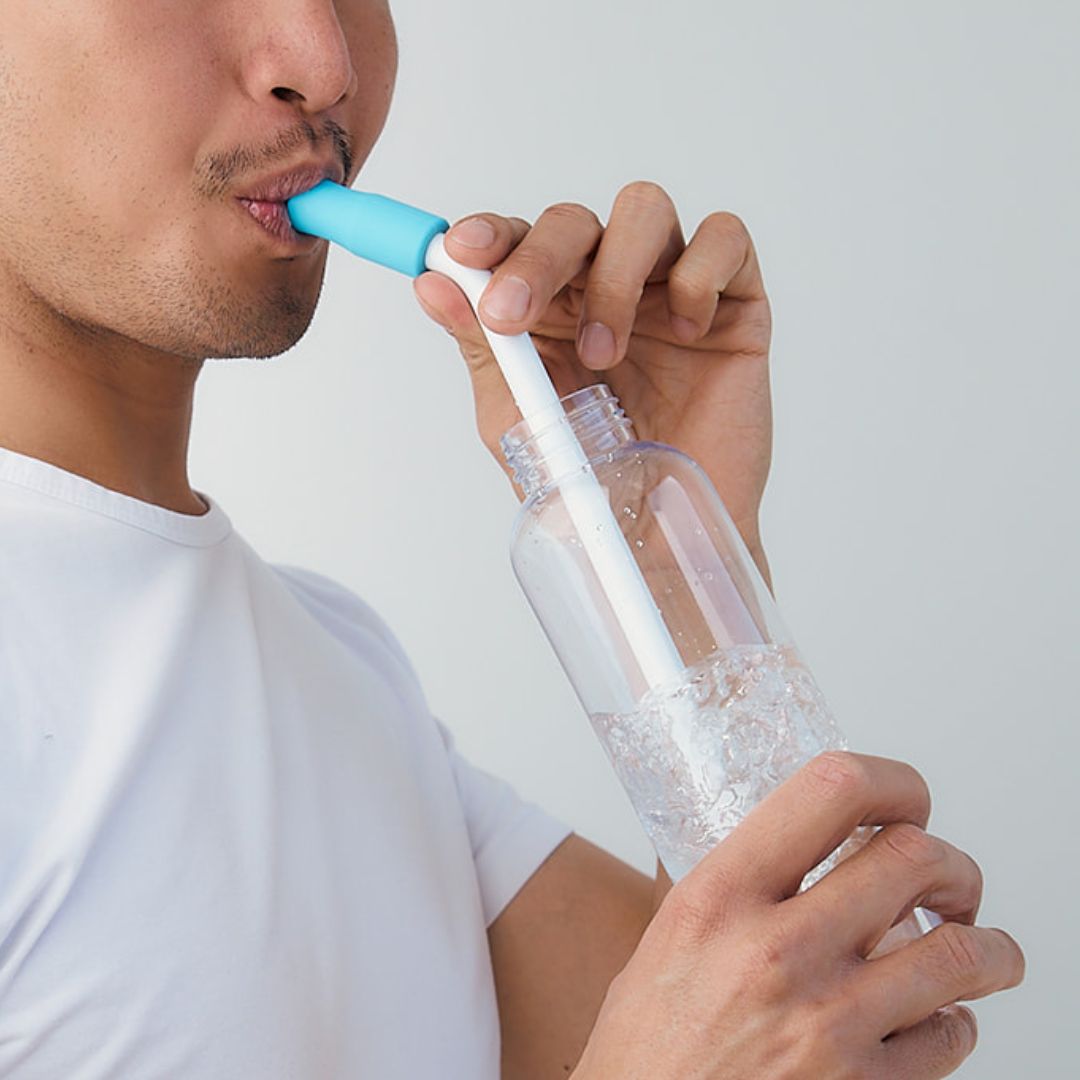
Step 5: Adding the Cup
When you’ve moved through the straw-only exercises included in this kit, you’re ready to add the cup. The cup allows you to add vowels and consonants while maintaining comfortable pressure in the throat.
Choosing the Right Cup Size
If you’re using the largest straw size (6mm), fit the straw into the White Cup. If you’re using any of the smaller straw sizes (3mm), use the Black Cup.
Add the Cup to the Straw
Insert the straw into the cup. Form a tight seal around your lips with the cup. Make sure no air is escaping. The straw should not be inside your mouth. Start doing warm-ups, sing through a song, yell, or shout!
Getting Started: Voice Straw H20™
Step 1: Wash Your Tools
Remove your lip cushion, and add a dab of the Voice Straw™ Cleaning Soap or dish soap on the cleaning brush. Scrub the inside and outside of each straw, lip cushion, and cup end-to-end. Rinse tools thoroughly with hot water. Let straws and cups air dry in a ventilated place. Do not put tools away wet. Clean and rinse cleaning brush regularly.
Do not put your kit in the dishwasher.
Step 2: Find Your Resting Larync Position
Place your hand on your larynx, where your Adam’s apple is (or would be). Pant like a small dog. The larynx should rise. Now, pant like a big dog. The larynx should lower. The resting position of your larynx should be between these two extremes.
Step 3: Add Water and Find Your Diameter
Grab your water bottle and fill it with 3-4 inches of water (taller the better as to avoid being in the splash zone)! Hot or cold water— it doesn't matter!
Making sure your larynx is in its resting position, you're going to start with the 10.5 mm "Big Kahuna" straw. Wrap your lips tight around the lip cushion, making sure no air is escaping through your mouth or nose.
Blow air into the straw in a steady stream. Now, give a gentle whoop, like you’re starting a cold car.
If you feel like you’re blowing air into the straw with no resistance, choose a smaller size.
Repeat the above exercises with smaller straws. If you feel tension or squeezing in your throat, choose a larger size.
When you have the correct size, you should feel a gentle expansion in the throat when you blow into the straw. There should be no pain or tension.
The right straw size for you may vary day-to-day. You may need to use a larger size after a difficult vocal session or if your voice is tired. Repeat this process every time you practice with the straw to ensure the right fit.
Still have questions? Check out the diagram below called "Choosing Your Resistance"
Step 4: Start Your Exercises
Once you’ve found the correct straw size, start with some gentle low-to high pitch glides into the straw. Experiment with dynamics.
When you feel comfortable vocalizing into the straw, you’re ready to begin the Voice Straw exercises!
Whether you're using the Voice Straw or Voice Straw H20™, the workouts will be the same!
Step 5: Adding the Cup
When you’ve moved through the straw-only exercises, you’re ready to add the cup. The cup allows you to add vowels and consonants while maintaining comfortable pressure in the throat.
The Voice Straw H2O™ kit comes with one cup size that works for 3.5 mm, 2.5 mm, and 1.5mm diameters. Please note, the largest 10.5mm diameter straw (AKA: "The Big Kahuna") is meant to be used by itself and not with the Voice Cup; it is primarily for recovery purposes.
Add the Cup to the Straw
Insert the straw into the cup. Form a tight seal around your lips with the cup. Make sure no air is escaping. The straw should not be inside your mouth. Start doing warm-ups, sing through a song, yell, or shout!

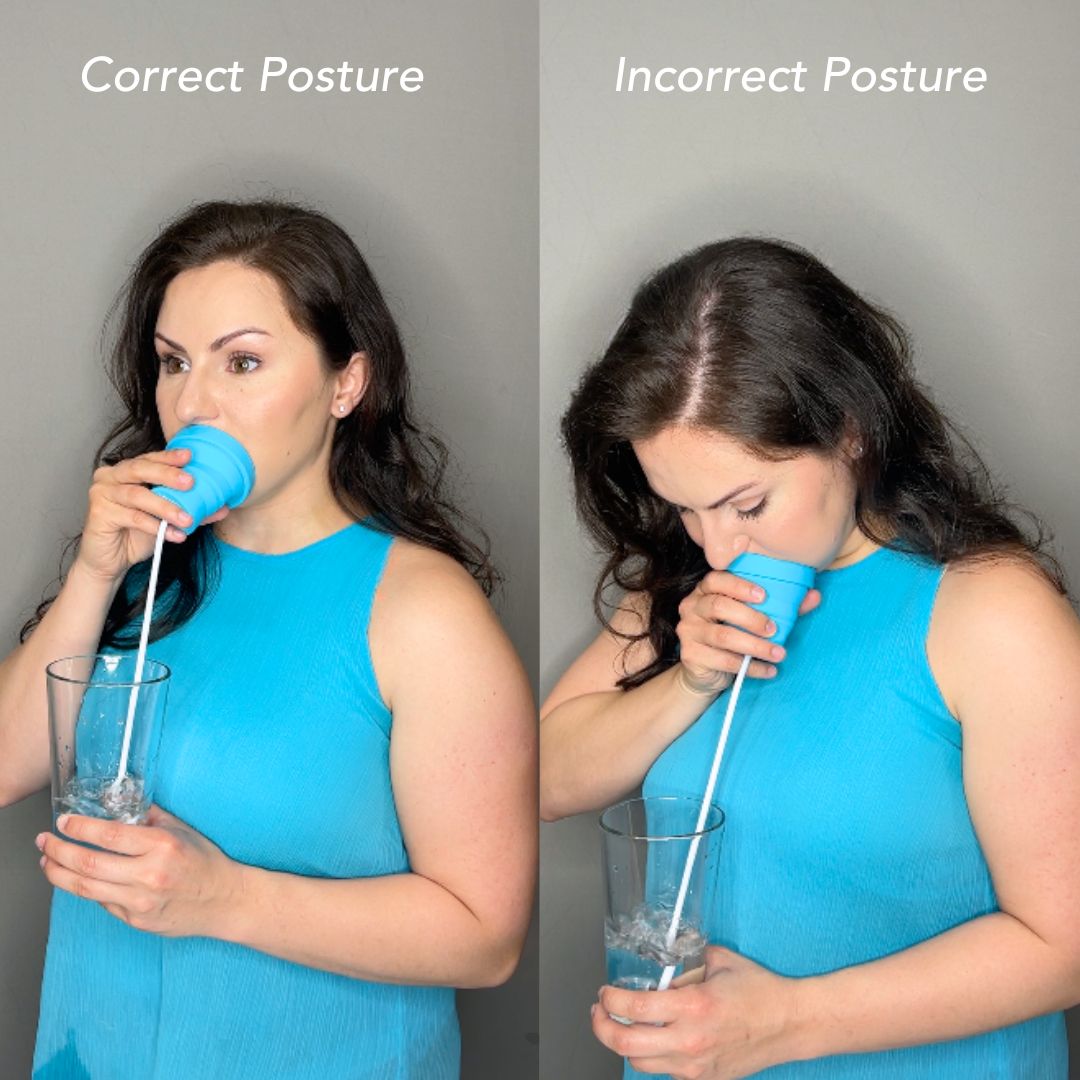
Maintain Your Posture
Proper alignment of the body ensures that the vocal tract remains open and unrestricted, allowing for optimal airflow and resonance. This alignment helps prevent unnecessary strain on the vocal folds and surrounding muscles, promoting more efficient and effective vocal production. Additionally, good posture facilitates better breath support and control, which are essential for achieving the desired phonation and sound quality during exercises with the Voice Straw!
-

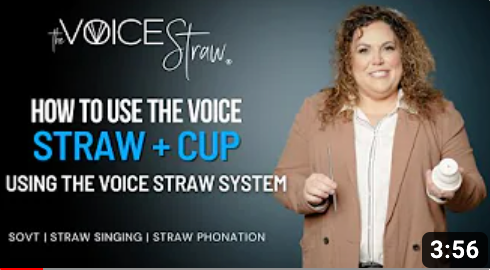
How to use the Straw & Cup
Watch NowMove through each step of training as demonstrated in this video to improve your vocal projection, tone, endurance, and to project the longevity of your voice.
-

-

What Does Straw Phonation Look Like?
Watch NowThis system gets your vocal tract and vocal folds in in their correct position so you can reach vocal freedom.